How to clean vape tanks properly starts with one important rule: follow the device maker’s instructions. Tanks differ in materials, seals, and coil design, so a method that suits one model may damage another. The National Academies’ 2018 report, Public Health Consequences of E-Cigarettes, reviews how device design and liquid composition influence aerosol chemistry. It does not establish a cleaning schedule. That matters: cleaning may remove residue and stale flavors, but it cannot make vaping risk-free.
Small details matter. Switch the device off, let it cool, and separate the tank from its power source before cleaning. For many models, the glass and metal tank parts can be rinsed with warm water, then left to dry completely on a clean cloth. Do not soak the battery, and do not wash a coil unless its manufacturer specifically allows it. A damp coil can perform poorly, and trapped water is easy to miss. Check seals and threads for residue, cracks, or loose fittings before reassembly. Replace damaged parts rather than trying to rescue them. There is no universal interval that suits every user; frequency depends on use, liquid, and the maker’s guidance. Honestly, it is easy to overclean. Gentle, complete drying is usually more sensible than aggressive scrubbing. This guide focuses on practical steps, common mistakes, and signs that a tank needs attention—not on promises of health protection.
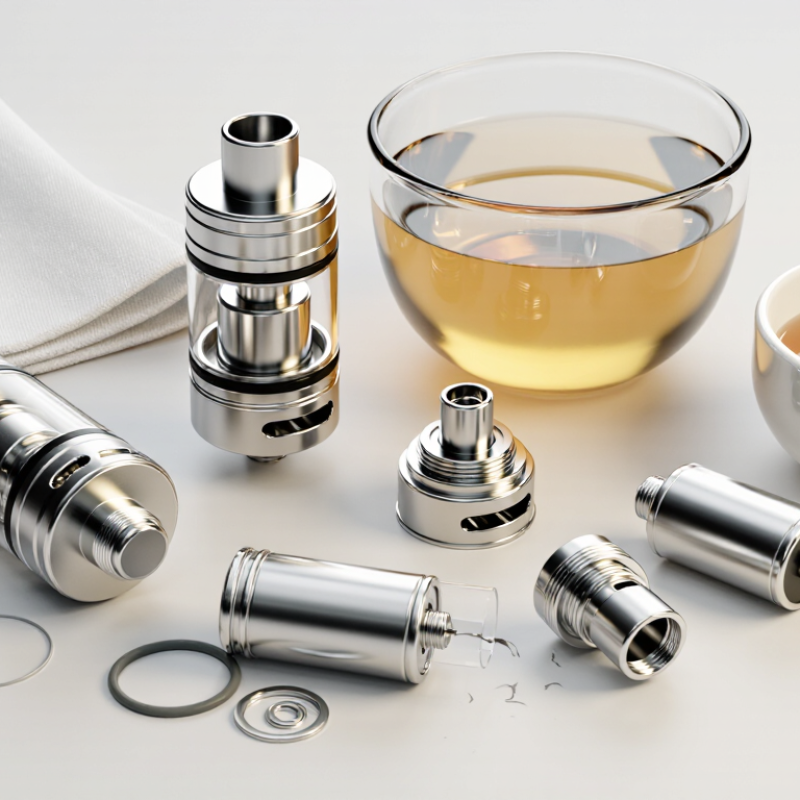
A vape tank usually needs cleaning when residue becomes visible, the flavor turns dull, or liquid starts tasting stale. Look closely at the glass, chimney, and narrow seams. Sticky film or dark flecks are practical warning signs. Gurgling or small leaks can also mean old liquid is collecting inside. A burnt taste is different: cleaning may not fix a worn coil. Check the device instructions before taking anything apart, and let the tank cool first.
There is no reliable universal cleaning interval. The National Academies’ 2018 report, Public Health Consequences of E-Cigarettes, found that aerosol chemistry varies with device characteristics and operating conditions. That matters because residue and flavor changes will not appear at the same pace in every tank. A fixed schedule sounds neat, but it can miss what the tank is showing you. Inspect it when changing liquid, and clean it if you see buildup or lingering odor. Rinse only removable tank parts as directed, then dry them fully before reassembly. Keep water away from electronic components. A clear tank can still hold residue; look carefully.
Before cleaning, set out a small bowl, warm water, mild unscented dish soap, a soft nylon brush, cotton swabs, and a lint-free cloth. Check the tank’s manual, since seals and finishes can react differently to cleaners. Keep the battery, coil, and other electrical parts away from water. Do not soak them. A shallow bowl helps prevent tiny parts from disappearing, though it is still easy to misplace an O-ring. One detail is easy to miss: inspect seals for cracks before reassembly.
For stubborn residue, use isopropyl alcohol only on glass or metal parts, and only if the manual permits it. Remove rubber seals first, then rinse cleaned parts thoroughly with water. The CDC/NIOSH Pocket Guide lists isopropyl alcohol’s flash point as 53°F (about 12°C), so keep it away from flames, sparks, and hot surfaces. Use it with good ventilation. A soft brush is usually enough; abrasive pads can scratch surfaces. Let every part air-dry completely before putting the tank back together. Drying takes patience. A damp seam can leave residue or affect how the tank fits.
Before cleaning, switch off the device, detach the tank, and let it cool completely. Empty any remaining liquid into an appropriate container. Work over a clean, dry towel; small seals can roll away surprisingly fast. Check the tank’s manual if its parts or opening method are unfamiliar.
Unscrew the base slowly, then remove the coil and any removable glass, mouthpiece, and fill cap. Some tanks use fitted glass or seals that should not be pried out, so stop if a part resists. Keep each piece in order on the towel, and note where each silicone ring sits. A quick phone photo can help during reassembly. The coil is often replaced rather than washed, but designs vary. Don’t guess.
Inspect the exposed threads and seals for residue, cracks, or stretching. Handle the glass by its edges, and set it away from the sink so it cannot slip. This separation makes rinsing easier later, while keeping the tank’s electrical connections dry. It may feel overly careful. That’s better than forcing a stuck part and damaging a seal.
| Component | How to Separate It | Cleaning Guidance | Drying and Reassembly |
|---|---|---|---|
| Tank and device | Turn the device off and detach the tank from the battery or mod. Empty any remaining e-liquid into an appropriate container. | Keep the battery or mod away from water. Clean the tank separately; do not immerse electronic parts. | Make sure the tank exterior and connection area are dry before attaching it again. |
| Coil or atomizer head | Unscrew or lift out the coil according to the tank design. | Most prebuilt coils are replaceable rather than washable. Do not rinse or soak a used coil; replace it if it tastes burnt, performs poorly, or is visibly worn. | Install a suitable new coil as directed. When applicable, prime its wick with e-liquid and allow it to saturate before use. |
| Glass or tank section | Carefully slide or lift the glass section away after removing the tank ends, if the design allows. | Rinse with lukewarm water. Use a small amount of mild, unscented dish soap only if needed, then rinse thoroughly. | Air-dry completely on a clean surface. Check for chips or cracks before reuse. |
| Top cap and mouthpiece | Unscrew or remove the top cap and mouthpiece where they are detachable. | Rinse with lukewarm water and gently remove residue with a soft, clean cloth or brush. | Let all surfaces dry fully, including openings and threaded areas. |
| Base and airflow ring | Unscrew the base from the tank section. Remove a movable airflow ring only if the tank is designed for it. | Rinse removable, non-electronic parts with lukewarm water. Avoid forcing parts that feel stuck. | Dry the air inlets and threads thoroughly so trapped water does not remain. |
| O-rings and seals | Remove seals gently only when necessary and only if they are designed to be removed. | Rinse with water and inspect for stretching, tears, flattening, or other damage. Avoid harsh cleaners and solvents. | Fit each seal back into its original groove without twisting or pinching it. Replace damaged seals. |
Note: Tank designs vary. Follow the device manual, use only cleaning methods suitable for its materials, and reassemble only when all washable parts are completely dry.
How to Clean Vape Tanks Properly?
Cleaning starts with a cool, disconnected device. Remove the tank and take it apart over a clean towel. Set aside the glass, metal sections, and mouthpiece. A used coil usually should not be washed; replace it if it tastes burnt or looks heavily soiled. For reusable parts, rinse away residue with warm water. If residue remains, use a little mild, unscented dish soap, provided the tank maker permits it. Avoid abrasive pads and harsh cleaners. They can scratch surfaces or leave unwanted residue. Take your time. Small seals are easy to lose.
Tips: Keep water away from the battery and other electrical parts. Rinse each washable piece until it feels clean and has no soapy smell. It is easy to rush this step, but leftover soap may affect the next fill.
Shake off excess water, then place the parts on a fresh, lint-free cloth in a well-ventilated area. Let them air-dry completely, including inside narrow openings and around seals. Do not reassemble damp parts; trapped moisture can dilute liquid or encourage corrosion. Check the seals for cracks and the glass for chips before putting the tank back together. If anything seems damaged, replace that part rather than forcing it into place. Drying takes patience. A few extra minutes can prevent a frustrating leak.
After cleaning, let the tank parts dry completely. Check the glass for chips and inspect the O-rings for twists, cracks, or stretching. Even a small gap can let liquid seep onto the battery connection. Seat each seal in its groove, then screw the tank together gently. Tighten it until snug, not forced; overtightening can pinch a seal or make later cleaning harder.
Fill the tank only to its indicated limit and keep liquid away from the central airflow tube. Stand it upright on a tissue for several minutes, then check the base, seams, and airflow openings for fresh moisture. A dry exterior is reassuring, but it does not prove the tank will stay leak-free after use. If liquid appears, empty the tank, check the seal placement, and reassemble it. Replace damaged seals rather than trying to stretch them back into shape. A 2016 Pediatrics study reported 7,043 e-cigarette or liquid-nicotine exposure cases among children under six from 2010 to 2015; 92.5% involved ingestion. This supports wiping spills promptly and storing liquid securely.
Tips: Use a clean, dry tissue beneath the tank during the leak check; a small wet spot is easier to notice. Avoid testing with the tank attached to a powered device. If a leak keeps returning, stop and check the parts against the device maker’s care instructions. One detail is easy to miss: a seal can look intact but sit slightly out of place.
After reassembly, inspect the top seal, glass joint, base connection, and airflow openings for e-liquid. The chart lists one visual check for each area; it does not represent measured leak rates.
Use warm water, mild unscented dish soap, a soft nylon brush, cotton swabs, and a lint-free cloth. A small bowl helps keep tiny parts together.
Yes. Seals and finishes can react differently to cleaners, so follow the tank’s care instructions.
Keep the battery, coil, and other electrical parts away from water. Do not soak them.
Usually, no. Replace it if it tastes burnt or looks heavily soiled.
Use mild soap if the manual permits it. Isopropyl alcohol may be suitable for glass or metal parts only, if permitted. Remove rubber seals first.
Avoid abrasive pads and harsh cleaners. They can scratch surfaces or leave residue. A soft brush is usually enough.
Rinse washable pieces until they feel clean and have no soapy smell. It is easy to rush this step.
Let every part air-dry completely, including narrow openings and areas around seals. Take your time. Trapped moisture can affect the fit.
Check seals for cracks and glass for chips. Replace damaged parts rather than forcing them into place; small O-rings are easy to misplace.
How to clean vape tanks properly begins with recognizing when cleaning is needed. Changes in flavor, visible residue, or buildup inside the tank may indicate that it is time for maintenance. Before starting, gather a soft cloth, warm water, and a small brush or cotton swab for reaching narrow areas. Work on a clean, dry surface so the parts can be kept organized.
Carefully disassemble the tank and separate its components, taking care not to force any part. Rinse the washable pieces with warm water and gently remove residue; use a cloth or swab for areas that need extra attention. Let every component dry completely before reassembling the tank, since trapped moisture can affect its use. Once assembled, check that the parts are seated securely and look for leaks before using the tank again.

Trivapix Vape